Google Tag Manager
Google Tag Manager (GTM) is a tag management system provided by Google. It simplifies the process of managing and deploying various tracking codes, scripts, and tags on a website or mobile app. With GTM, you can centrally manage and control all your marketing and analytics tags without directly modifying your website's code.
To set up the Snowplow collectors, please refer to the following links for the URL configuration
Adding Collector URL in Google Tag Manager
- Open your Google Tag Manager account and navigate to your container.
- Click on Variables in the left sidebar and then click on the New button User-Defined Variables to create a new variable.
- Click on Discover more variable types in the Community Template Gallery and add Snowplow v3 Settings.
- Enter your Collector URL in the Collector Endpoint Hostname field and modify the identifier name in the Application ID field.
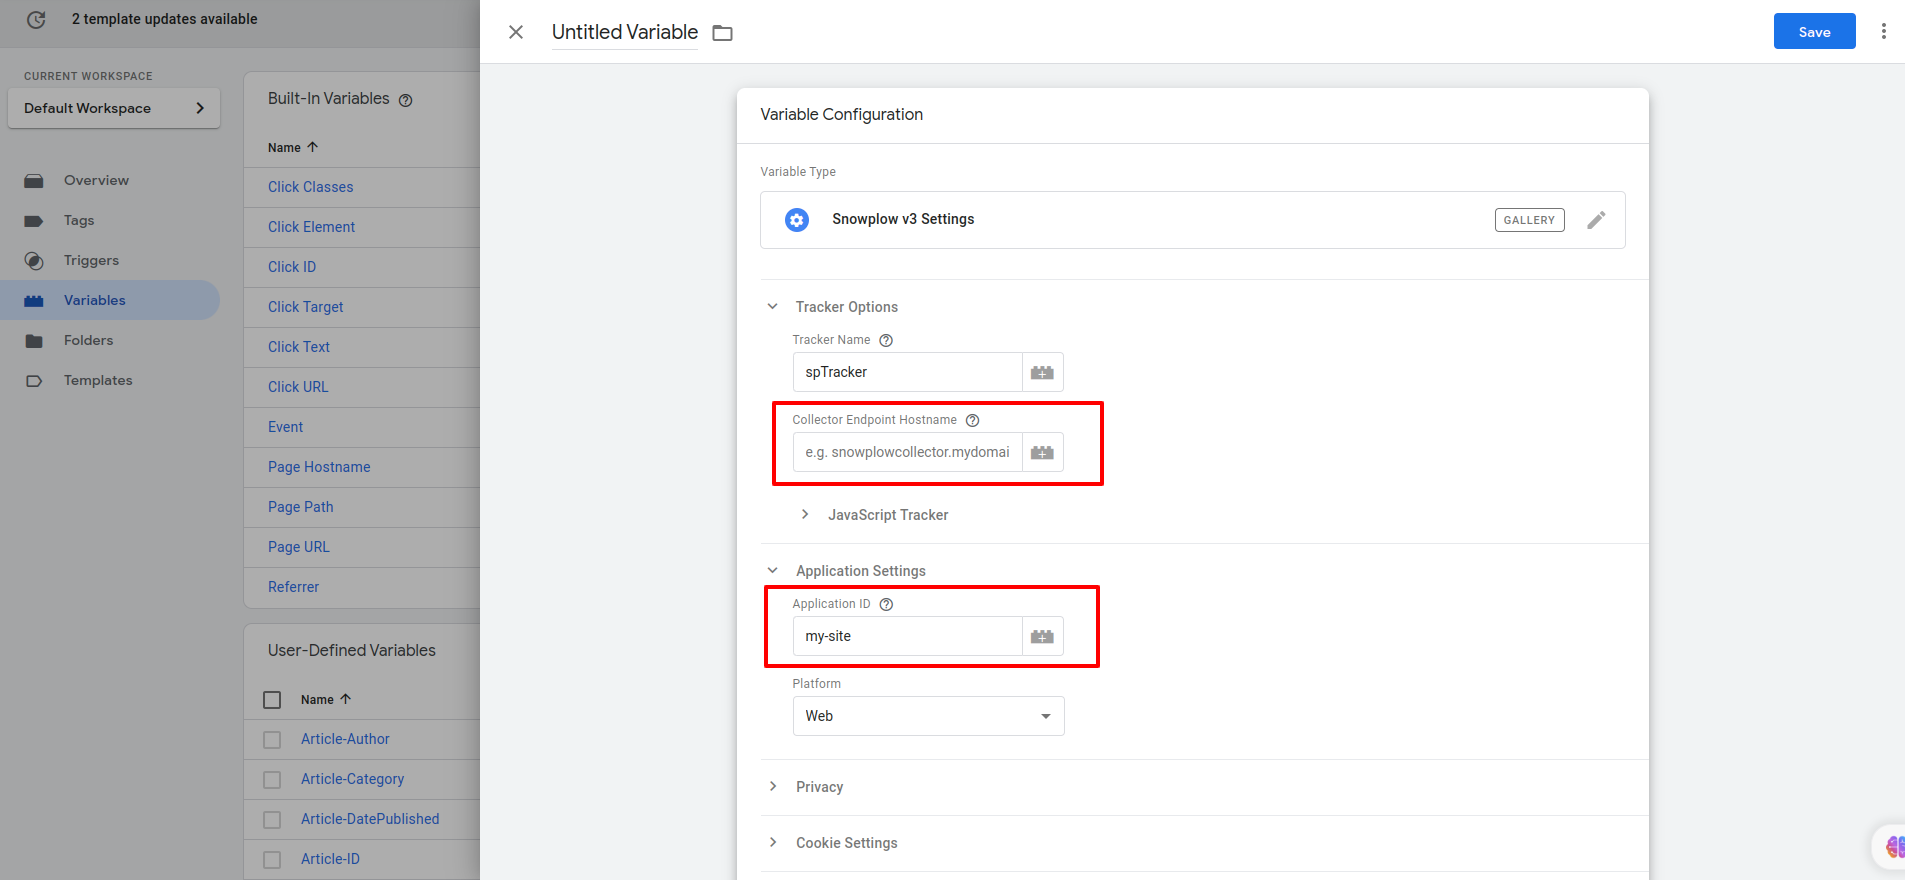
- Provide a name for the variable and click on the "Save" button to save the configuration.
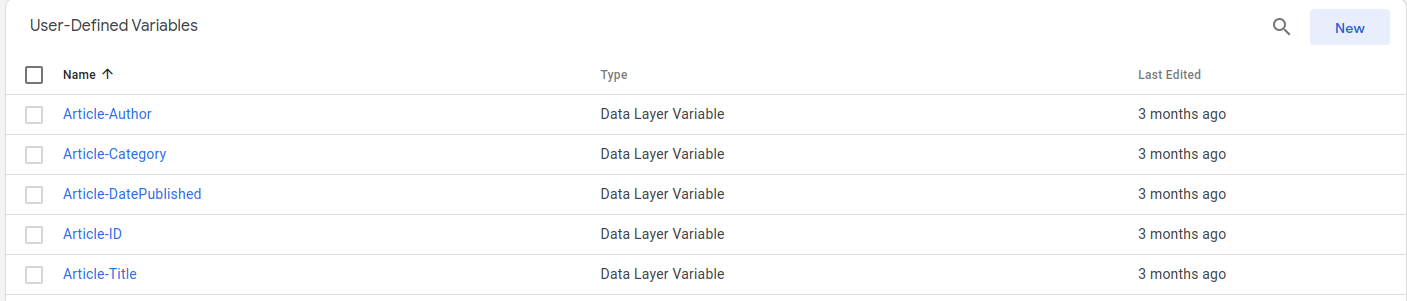
Creating Variables
- In Google Tag Manager, click on "Variables" in the left sidebar.
- To create a new variable, click on the "New" button.
- Choose the appropriate variable type based on your requirements. you can select "Data Layer Variable".
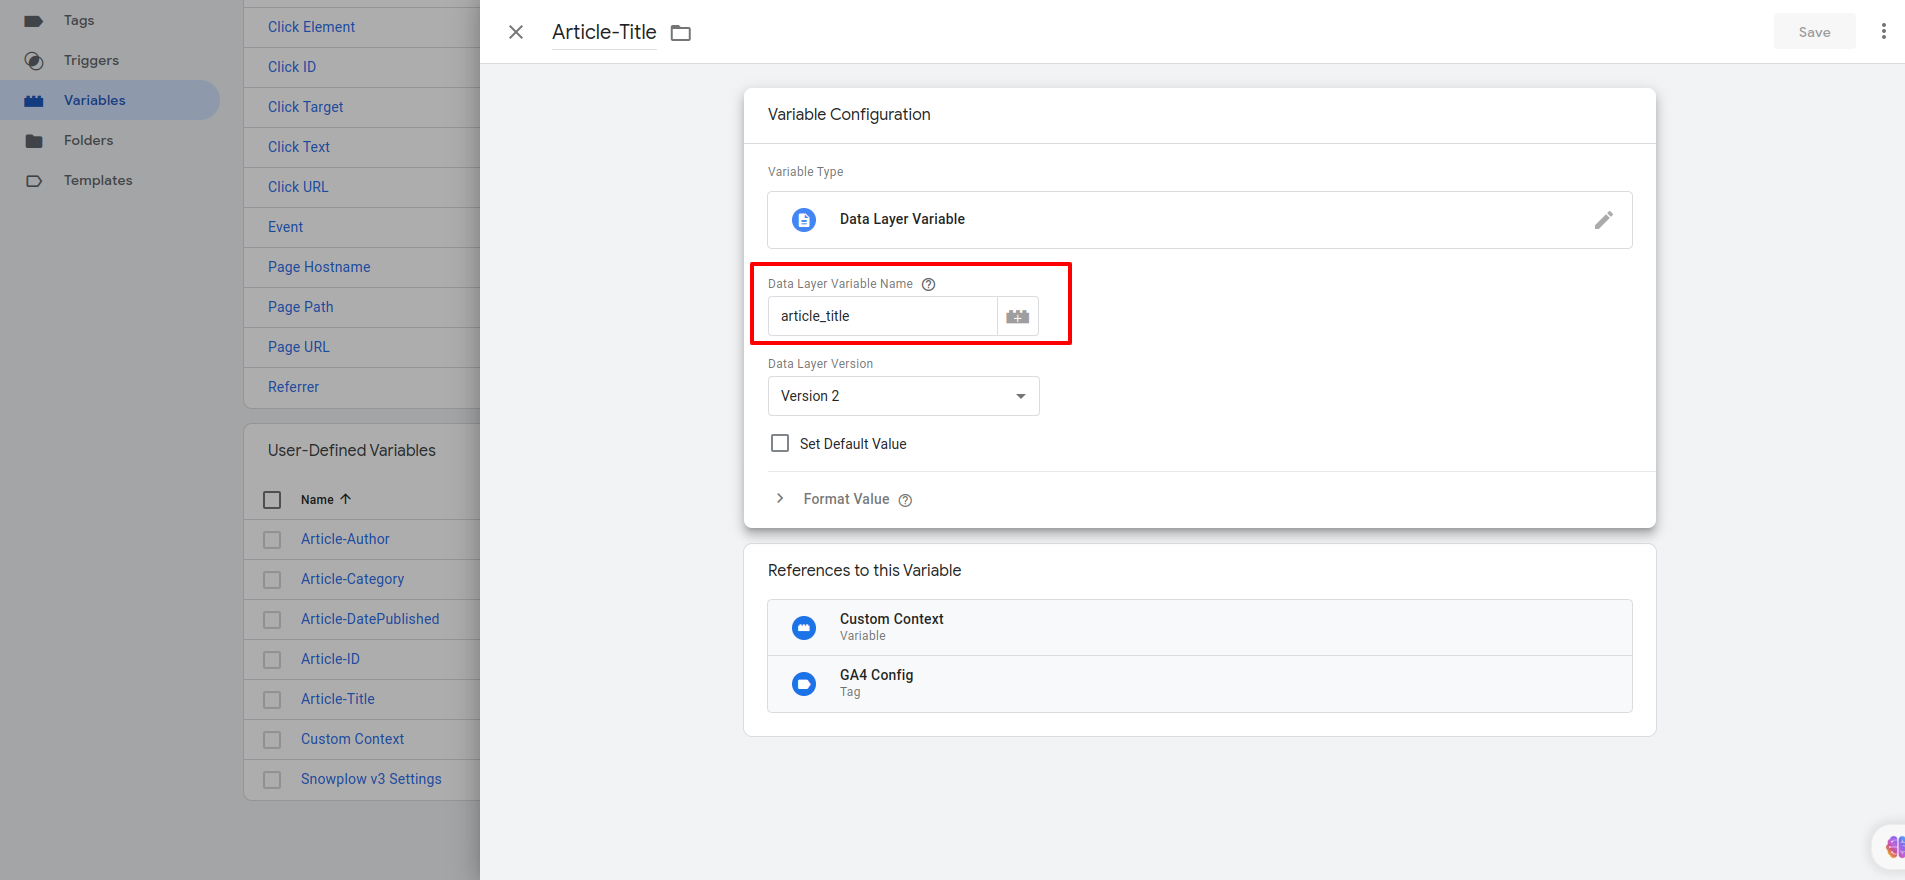
- Provide a name for the variable and click on the "Save" button to save the configuration.
- Create variables that capture the specific data you want to send to Snowplow. Specify the desired variable names and configure them accordingly.
Custom Context
To create a custom context, follow these steps:
- Create a new variable with the type "Custom JavaScript".
- Write the custom JavaScript function in the text editor.
- Save the function with an appropriate name that reflects its purpose.

Example
function() {
  if (!{{Article-Title}}) {
    return [];
  }

  var customVar = [{
    "schema": "iglu:io.snowplow.foundation/content/jsonschema/1-0-0",
    "data": {
      "author": {{Article-Author}},
      "name": {{Article-Title}},
      "id": {{Article-ID}},
      "date_published": {{Article-DatePublished}},
      "category": {{Article-Category}}
    }
  }];

  return customVar;
}
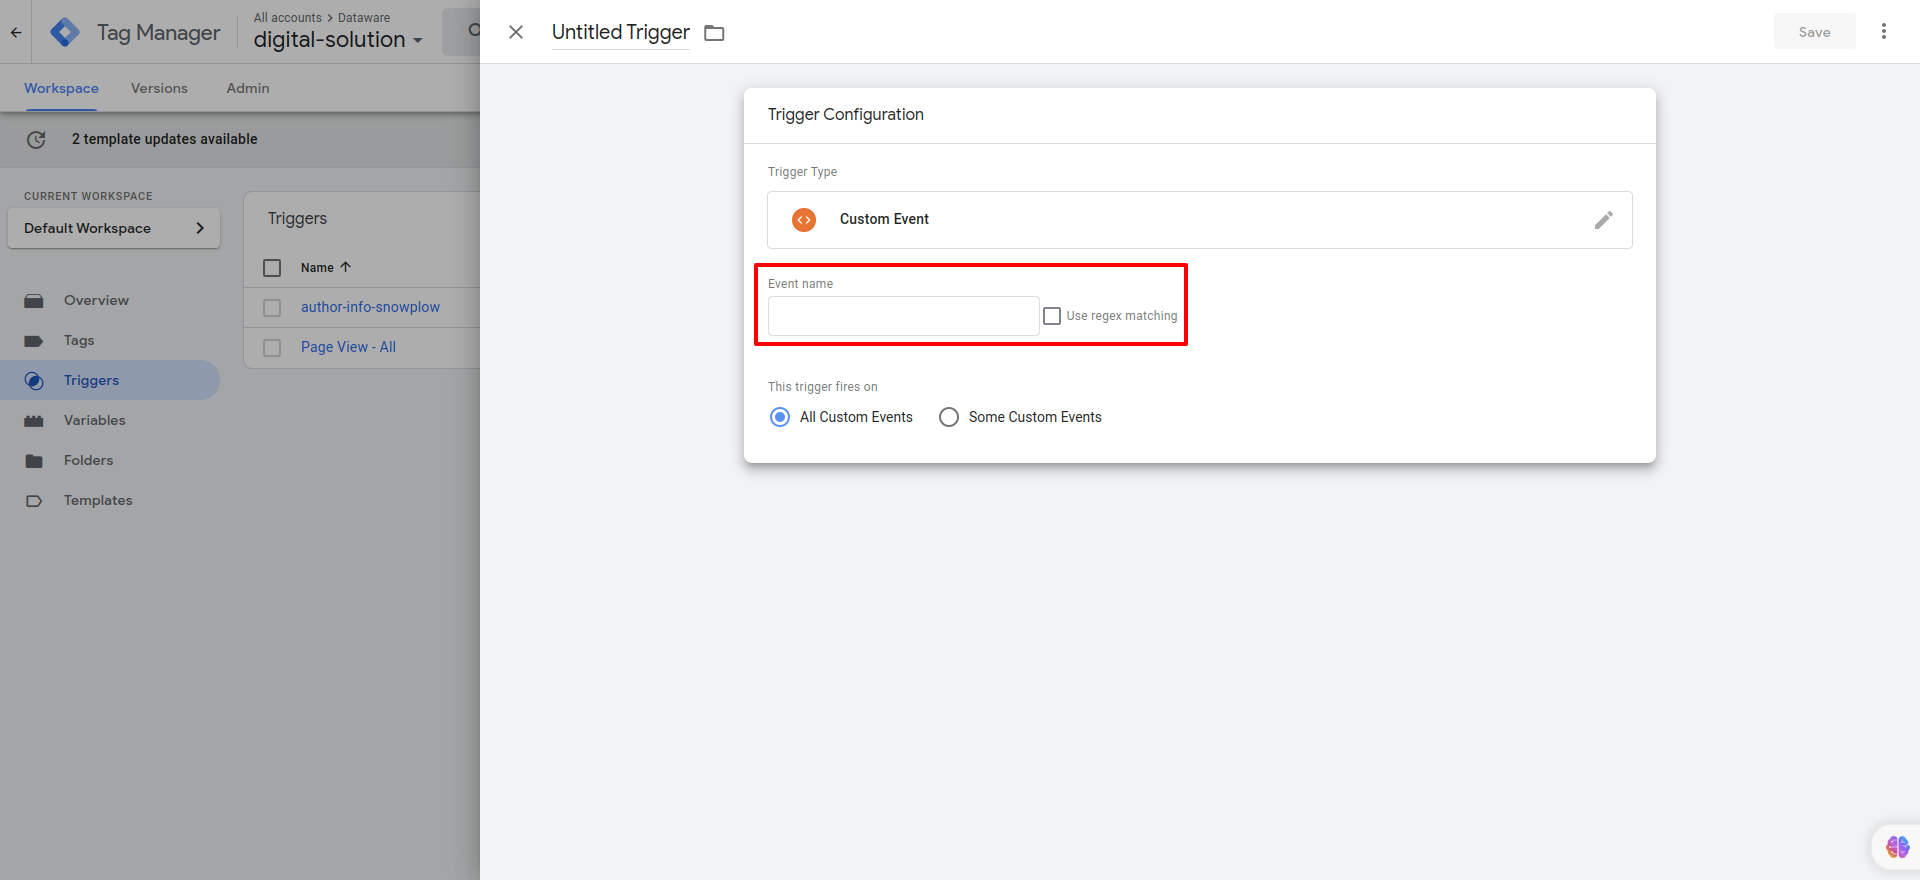
Creating Triggers
- In Google Tag Manager, click on "Triggers" in the left sidebar.
- To create a new trigger, click on the "New" button.
- Choose the trigger type Custom Event and enter the event name in Event name.
- Provide a name for the variable and click on "Save" to save the trigger configuration.
Creating Tags
- In Google Tag Manager, click on "Tags" in the left sidebar.
- To create a new tag, click on the "New" button.
- Select the tag type Snowplow v3.
- Configure the tag settings for
- Tracker Initialization select the variable that you created, containing your collector URL, from the dropdown menu.
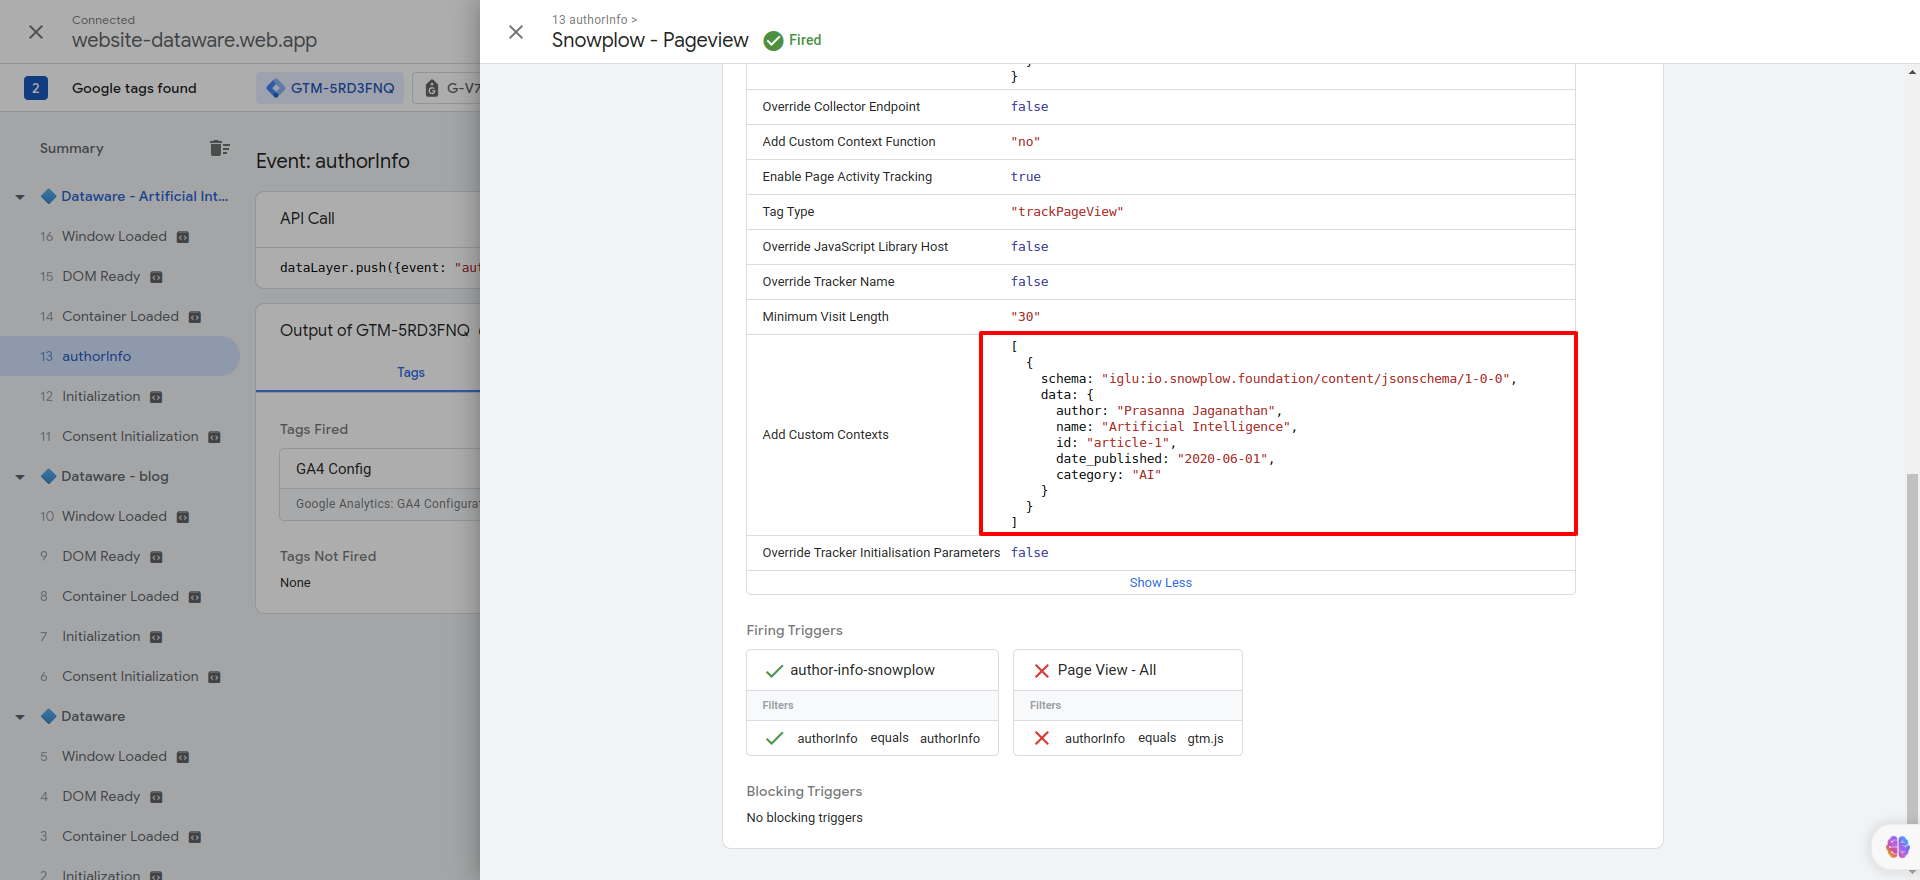
- Add Custom Context select the variable that you created, containing your custom JavaScript function, from the dropdown menu.
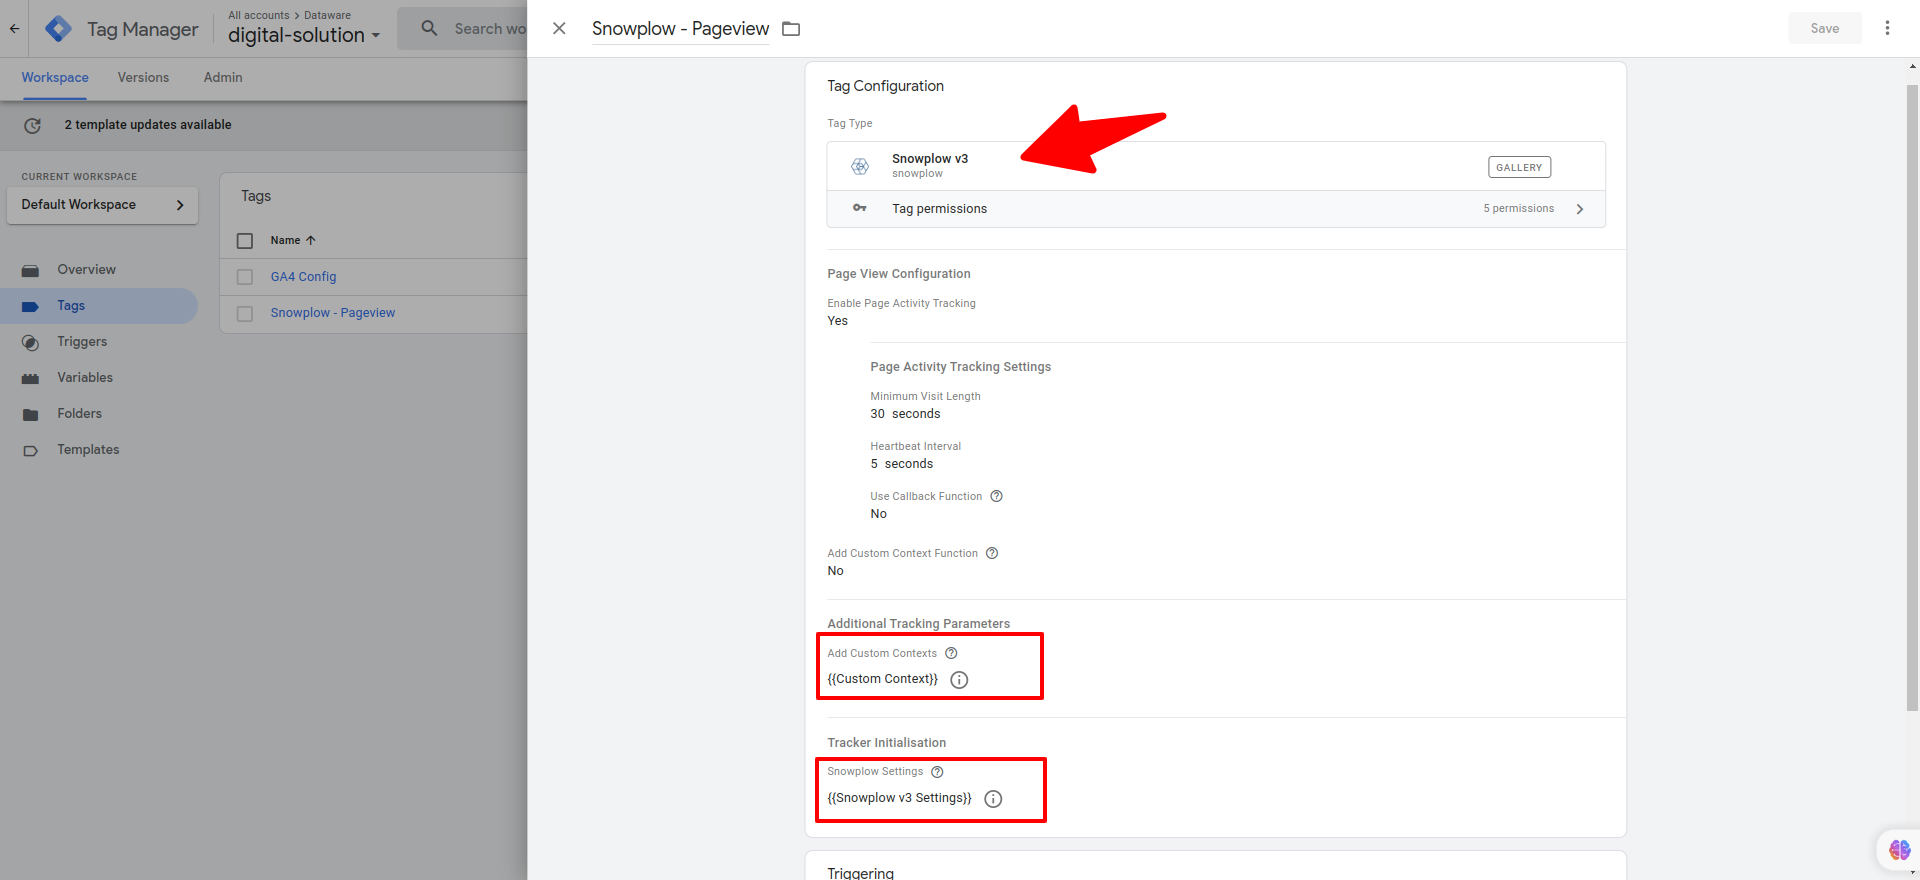
- Under "Triggering," choose the trigger that you previously created for Snowplow.
- Provide a name for the variable and click on "Save" to save the tag configuration.
After you have completed the necessary configurations in Google Tag Manager, click on Submit in the upper right corner to publish the changes. In the "Workspace Changes" window, add a descriptive version name and description to document the changes you made. Click on Publish to publish the container changes. Once published, you'll need to implement the Google Tag Manager code on your website. Copy the provided container snippet.
Implementation of Google Tag Manager Code on Your Website
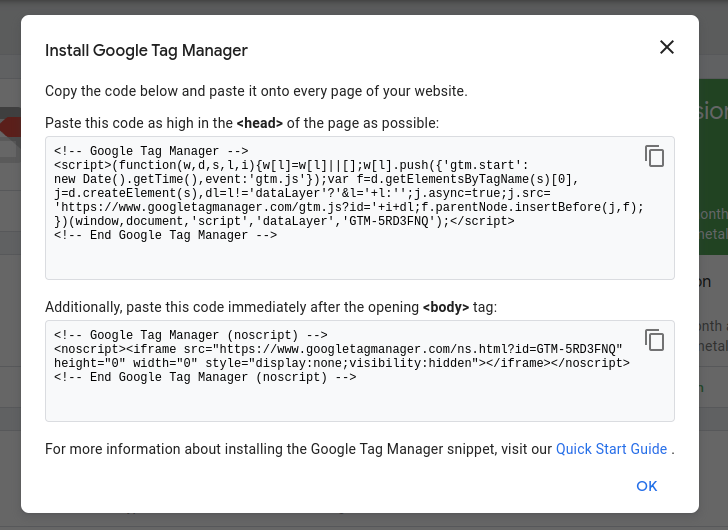
- Copy the code from the GTM container snippet and paste it into the HTML file of your website that requires tracking.
- Assign the appropriate values to the variables you have created in the variables section, and specify the desired events within the triggers you have created.
 <script>
      window.dataLayer = window.dataLayer || [];
      window.dataLayer.push({
        event: "authorInfo",
        author: "John David",
        article_title: "Artificial Intelligence",
        id: "article-1",
        date_published: "2020-06-01",
        category: "AI",
        author_id: 100
      });
</script>
<script>
      (function (w, d, s, l, i) {
        w[l] = w[l] || [];
        w[l].push({ "gtm.start": new Date().getTime(), event: "gtm.js" });
        var f = d.getElementsByTagName(s)[0],
          j = d.createElement(s),
          dl = l != "dataLayer" ? "&l=" + l : "";
        j.async = true;
        j.src = "https://www.googletagmanager.com/gtm.js?id=" + i + dl;
        f.parentNode.insertBefore(j, f);
      })(window, document, "script", "dataLayer", "GTM-5RD3FNQ");
</script>
Save the changes made to your website's code. If your website uses a version control system, commit the changes. Publish the updated website code to make it live.
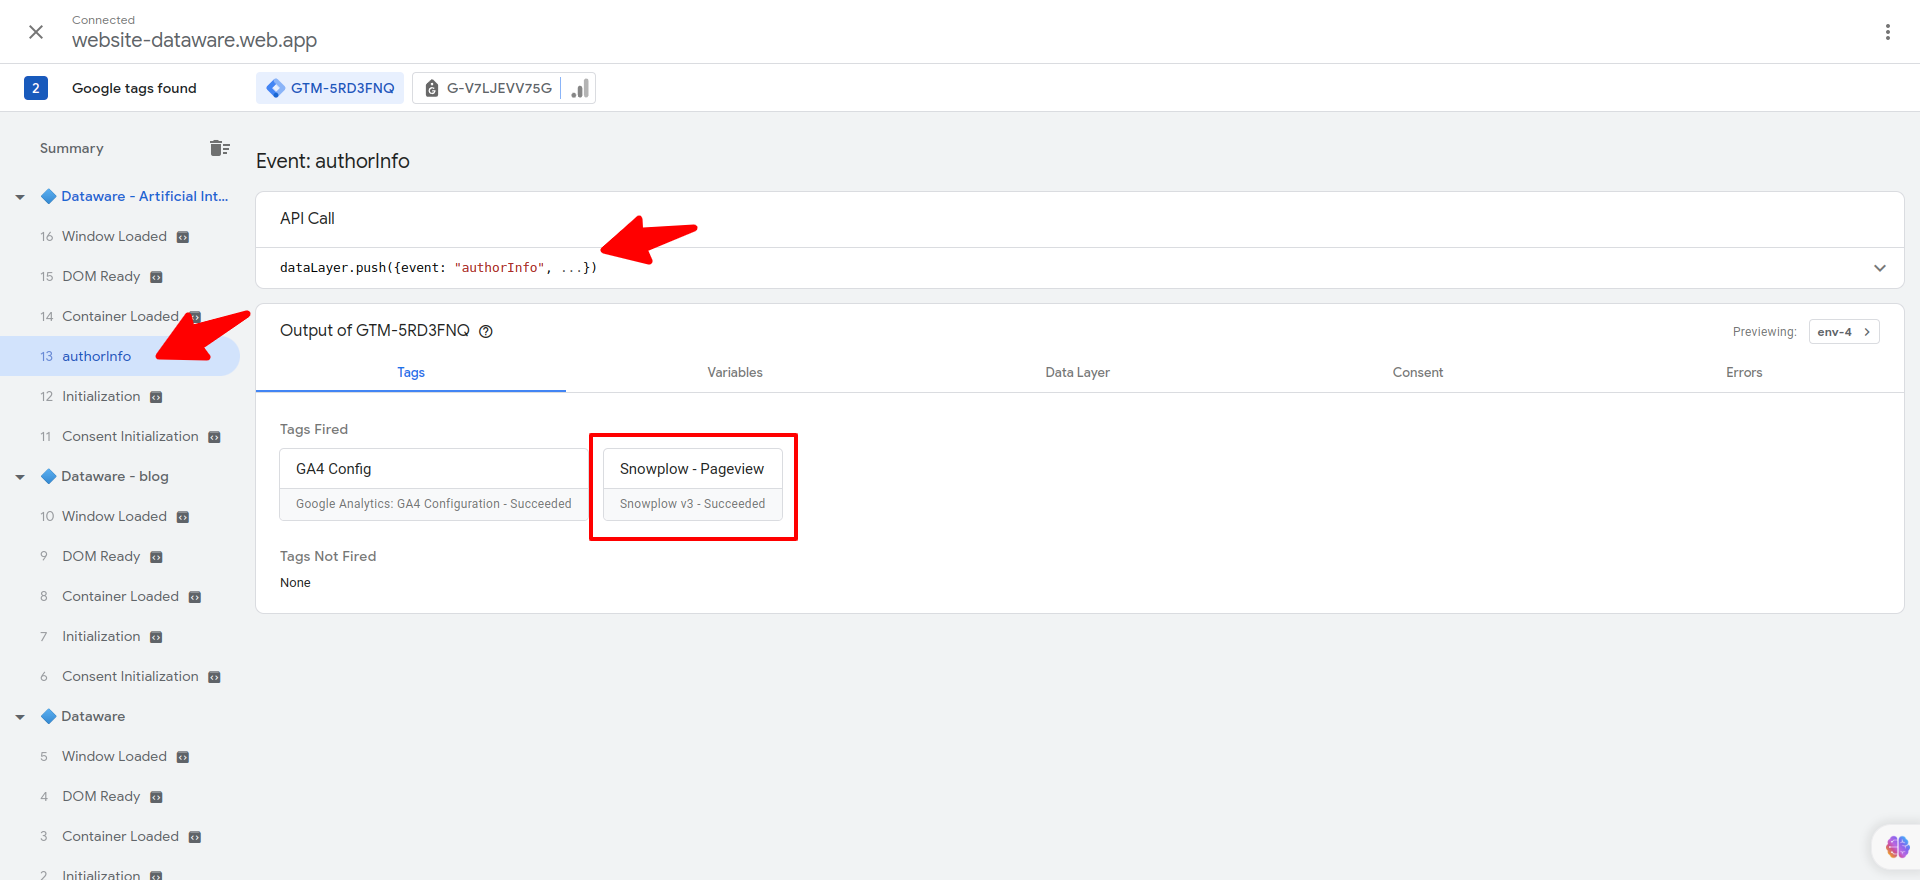
Verify the implementation: Once the changes are live, it's crucial to verify if Google Tag Manager is working correctly on your website.Follow these steps:
Open your website in a browser.
Install the Google Tag Assistant Chrome extension (if not already installed).
Visit a few pages of your website and observe the tag assistant icon in the Chrome toolbar.
Click on the tag assistant icon to open the extension. It will display a summary of the tags fired on the current page.
Ensure that the Google Tag Manager tag is listed and firing correctly.